Here's a great use for the chipboard circles included in the "Hudson" kit! Wendy has used it as the base for an organza flower. Creating an organza flower without any kind of support would be a difficult task. Wendy shows you here how easy it can be!
First up...create an organza flower
Step1 - place a blob of glue in the centre of the chipboard circle
Step 2 - start scrunching and curling the ribbon around in a circle
Step 3 - once you are happy with the look of the ribbon stick the end piece to the base
Step 4 - spray glimmermist in your choice of colour on the flower to compliment your layout
Step 5 - leave to dry
Step 6 - adhere a little rosette brad in the centre for decoration
(you could use a button or a different kind of brad)
Bunting on layouts continues to grow in popularity. Here Wendy shares with you how to create a fun bunting element for your next layout!
Now onto the bunting...
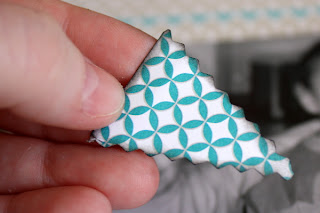
Step 7 - with pinking scissors, cut your paper on an angle to create a triangle shape
Step 8 - ink the edges of each triangle
Step 9 - using 3D tape, adhere to your layout in a curved shape
Step 10- carefully glue on some twine to finish off the banner look and place buttons either end!
Here's the final product! Wendy has used the bunting across the top of her layout, and created a cluster of elements incorporating the organza flower. Such a sweet layout about Wendy's boys.
Enjoy creating these fun elements for your next scrapbooking project!
Cheers, Lis.


No comments:
Post a Comment